This practical codelab is part of Unit 11: Location maps and places in Mobile Development You will get the most value out of this course if you work through the codelabs in sequence:
For details about the course, including links to all the concept chapters, apps, codelabs and slides, see Blackboard.
Introduction
This codelab will take you through the process of using the Google
Places API for Android. This Android SDK is not quite as flexible as
the Web API for Google Places, but allows us to do most things that
the Web API can do.
What you should already know
You should be able to:
- Creating, building, and running apps in Android Studio.
- The activity lifecycle.
- Including external libraries in your build.gradle file.
- Creating responsive layouts with ConstraintLayout.
What you'll learn
- Set up your program with an API key.
- Use the place autocomplete widget and filter the results
- Get details of a specific place
- Get the photos associated with a specific place.
What you'll do
- Get an API key from the Google API Console and register the key to your app.
- Add a search bar that autocompletes a user's search for a place.
- filter that search to a region or type of establishment
- select a place to see the full details of that place
- display all of the photos from that place.
Create a new Android Project and select Basic Activity as the template, name the project GooglePlaces and set the Minimum SDK to API: 18 Android 4.3 (Jelly Bean)
- The Places SDK for Android library is available through Google's Maven repository. To add the SDK to your app, open your top-level
build.gradlefile, look at the buildscript.repositories section and make sure Google's Maven repo is listed:buildscript { repositories { google() jcenter() } - Open your app-level build.gradle file. In the dependencies section, add a dependency to the Places SDK for Android (your project will contain other dependencies as indicated by the comments below, but those are not shown here):
dependencies {
// ... other implementation dependencies
	implementation 'com.google.android.libraries.places:places:2.4.0'
// ... testing dependencies
}
Before you begin
Before you start using the Places SDK for Android, you need a project with a billing account and the Places API enabled. To learn more, see Get Started with Google Maps Platform.
Creating API keys
The API key is a unique identifier that authenticates requests associated with your project for usage and billing purposes. You must have at least one API key associated with your project.
To create an API key:
- In the Cloud Console, on the project selector page, select or create a Google Cloud project for which you want to add an API Key.
- Click on the Hamburger menu at the top left of the "Google Cloud Platform" and select APIs & Services > Credentials to go to your project's credentials page..
- On the Credentials page, click Create credentials > API key.
- The API key created dialog displays your newly created API key.
- Click Close.
- The new API key is listed on the Credentials page under API keys. It will be called something like API key 1
- Click on your new API key. We can now rename the key. In the Name box, delete the original name and enter Places Key
- Currently this key is unrestricted. We will come back and restrict this key later so that on Android apps may use it. For now clickSave.
- Go to the Dashboard for your project and click on + ENABLE APIS AND SERVICES and then click on Places API. Here is a direct link to the Places API. Ensure that the API is enabled for this project.
Create your project's SHA-1 certificate fingerprint
There are two kinds of certificates:
- A debug certificate: The Android SDK tools generate this certificate automatically when you do a debug build. Only use this certificate with apps that you're testing. Do not attempt to publish an app that's signed with a debug certificate. The debug certificate is described in more detail in Signing in Debug Mode in the Android Developer Documentation.
- A release certificate: The Android SDK tools generate this certificate when you do a release build. You can also generate this certificate using the keytool program. Use this certificate when you are ready to release your app to the world.
We will create a debug certificate for now. Follow the steps below to display a certificate's SHA-1 fingerprint using the keytool program with the -v parameter. For more information about Keytool, see the Oracle documentation.
- Locate your debug keystore file. The file name is
debug.keystore, and is created the first time you build your project (click Build > Rebuild Project in Android Studio now to do that). By default, the keystore file is stored in the same directory as your Android Virtual Device (AVD) files:- macOS and Linux:
~/.android/ - Windows:
C:\Users\your_user_name\.android\
- macOS and Linux:
- List the SHA-1 fingerprint:
- For Linux or macOS, open a terminal window and enter the following:
keytool -list -v -keystore ~/.android/debug.keystore -alias androiddebugkey -storepass android -keypass android - For Windows, run:
keytool -list -v -keystore "%USERPROFILE%\.android\debug.keystore" -alias androiddebugkey -storepass android -keypass android
- For Linux or macOS, open a terminal window and enter the following:
You should see output similar to this:
Alias name: androiddebugkey
Creation date: Jan 01, 2013
Entry type: PrivateKeyEntry
Certificate chain length: 1
Certificate[1]:
Owner: CN=Android Debug, O=Android, C=US
Issuer: CN=Android Debug, O=Android, C=US
Serial number: 4aa9b300
Valid from: Mon Jan 01 08:04:04 UTC 2013 until: Mon Jan 01 18:04:04 PST 2033
Certificate fingerprints:
     MD5:  AE:9F:95:D0:A6:86:89:BC:A8:70:BA:34:FF:6A:AC:F9
     SHA1: BB:0D:AC:74:D3:21:E1:43:07:71:9B:62:90:AF:A1:66:6E:44:5D:75
     Signature algorithm name: SHA1withRSA
     Version: 3
The line that begins SHA1 contains the certificate's SHA-1 fingerprint. The fingerprint is the sequence of 20 two-digit hexadecimal numbers separated by colons. Make a note of this value because you need it in the next step.
Restrict your API key
We will now restrict your API key. Restricting API Keys adds security to your application by ensuring only authorized requests are made with your API Key. We strongly recommend that you follow the instructions to set restrictions for your API Keys. For more information, see API Key best practices.
- Go to the Google Cloud Console Project Selector Page and select your project.
- Go to the API's & Services > Credentials page
- Select your Places Key. The API key property page appears.
- Under Key restrictions, set the following restrictions:
- Under Application restrictions:
- Select Android apps.
- Click ADD AN ITEM.
- Enter your package name (You can find this in the
AndroidManifest.xmlin themanifesttag at the start of the file) and SHA-1 certificate fingerprint. For example:
anduk.aston.googleplaces
Use the SHA-1 fingerprint that you generated in the steps above.BB:0D:AC:74:D3:21:E1:43:67:71:9B:62:91:AF:A1:66:6E:44:5D:75 - Click DONE.
- Under API restrictions:
- Click Restrict key.
- Select Places API from the Select APIs dropdown.
(If the Places API is not listed, you need to enable it.)
- Under Application restrictions:
- To finalize your changes, click Save.
- You new key will be listed under API Keys. Copy the Key, by clicking the copy icon next to the generated Key value.
- In your Android Project, open res > values > strings and create a new string, pasting the copied Key as the value of this string:
<string name="places_key">PASTE YOUR KEY HERE</string> - Open your
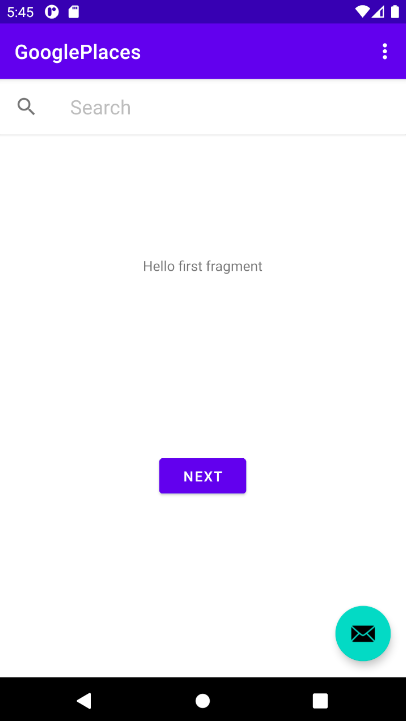
MainActivity.javaand add the following two lines to the end of youronCreatemethod:// Initialize the SDK Places.initialize(getApplicationContext(), getResources().getString(R.string.places_key)); // Create a new PlacesClient instance PlacesClient placesClient = Places.createClient(this); - Run your App. You should see the default page of the FirstFragment which we have not yet changed.
The autocomplete service in the Places SDK for Android returns place predictions in response to user search queries. As the user types, the autocomplete service returns suggestions for places such as businesses, addresses, plus codes, and points of interest.
Add an autocomplete widget
The autocomplete widget is a search dialog with built-in autocomplete functionality. As a user enters search terms, the widget presents a list of predicted places to choose from. When the user makes a selection, a Place instance is returned, which your app can then use to get details about the selected place.
- Open res > layout > fragment_first.xml
- Add the following
CardViewcontaining theAutocompleteSupportWidgetto your layout:<androidx.cardview.widget.CardView android:id="@+id/cardview" android:layout_width="match_parent" android:layout_height="wrap_content" app:layout_constraintTop_toTopOf="parent" tools:layout_editor_absoluteX="144dp"> <fragment android:id="@+id/autocomplete_fragment" android:name="com.google.android.libraries.places.widget.AutocompleteSupportFragment" android:layout_width="match_parent" android:layout_height="wrap_content" /> </androidx.cardview.widget.CardView>- By default, the
AutocompleteSupportWidgetfragment has no border or background. To provide a consistent visual appearance, we nest the fragment within another layout element such as aCardView. - If you are using the Autocomplete fragment, and need to override
onActivityResult, you must callsuper.onActivityResult, otherwise the fragment will not function properly.
- By default, the
- Change the layout constraint on the
Textviewwith the idtextview_firstso that it is constrained to be below theCardViewapp:layout_constraintStart_toStartOf="@id/cardview" - Run the program. You should see a search bar at the top of your FirstFragment layout:
Add a PlaceSelectionListener
The PlaceSelectionListener handles returning a place in response to the user's selection.
- Open FirstFragment.java
- We need to create a reference to the autocomplete fragment and add a listener to your
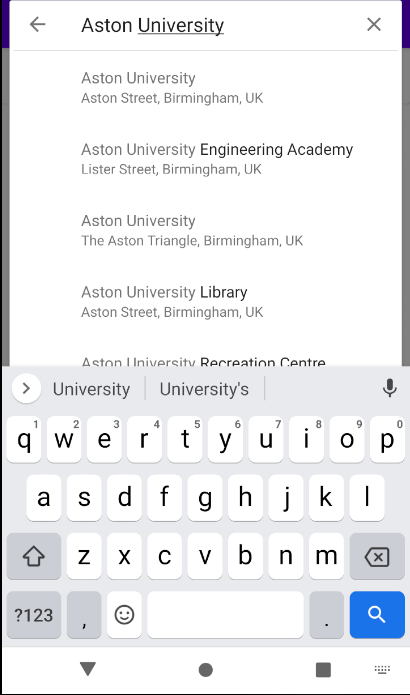
AutocompleteSupportFragment. To implement that, add the code below to the end of yourFirstFragment'sonViewCreated:// Get a reference to the TextView TextView text = view.findViewById(R.id.textview_first); // Initialize the AutocompleteSupportFragment. AutocompleteSupportFragment autocompleteFragment = (AutocompleteSupportFragment) getChildFragmentManager().findFragmentById(R.id.autocomplete_fragment); // Specify the types of place data to return. autocompleteFragment.setPlaceFields(Arrays.asList(Place.Field.ID, Place.Field.NAME)); // Set up a PlaceSelectionListener to handle the response. autocompleteFragment.setOnPlaceSelectedListener(new PlaceSelectionListener() { @Override public void onPlaceSelected(@NotNull Place place) { text.setText("Place: " + place.getName() + ", " + place.getId()); } @Override public void onError(@NotNull Status status) { text.setText("An error occurred: " + status); } }); - Run the app. When you click on the search bar and enter a place name, you should see a drop down list of matching places as shown below:
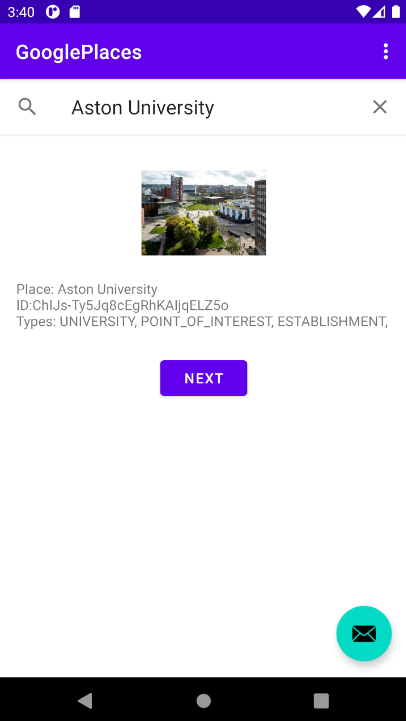
When you select one of those places, the name of the selected place and its ID are displayed on the page in theTextViewas shown below:
Getting additional information about a place
The information we can find out about a place is determined by the place data fields that we ask for. In the code above we specified the following:
// Specify the types of place data to return.
autocompleteFragment.setPlaceFields(Arrays.asList(Place.Field.ID, Place.Field.NAME));
which primes the request to return the place ID and the place name. To get more information returned in a response, we need to add more place fields to the AutocompleteFragment. Here is a list of the basic data we can obtain.
Field | SDK Type |
Address Component |
|
Business Status |
|
Formatted Address |
|
Viewport |
|
Location |
|
Name |
|
Photo |
|
Place ID |
|
Plus Code |
|
Type |
|
UTC Offset |
|
Note that if the data is not available, the field will not be returned at all. If you ask for photo data and a place has no photos then the field will not be included in the result. Some of the data fields return a list of values, such as the TYPES field which returns all of the types associated with the place. When asking for photo data, what gets returned is not the photos themselves but some metadata. If you want the actual photo, you need to request that separately. The metadata includes data on all the available photos so you can request one or you can request them all and display them in some kind of gallery.
Getting the types associated with a place
In this section we will get the list of place types.
- Open
FirstFragment.javaif it is not already open and edit the list of place types to be set for your AutocompleteFragment so that you includePlace.Field.TYPES:// Specify the types of place data to return. autocompleteFragment.setPlaceFields(Arrays.asList(Place.Field.ID, Place.Field.NAME, Place.Field.TYPES)); - Update your PlaceSelectionListener to extract the type data:
@Override public void onPlaceSelected(@NotNull Place place) { StringBuffer typelist = new StringBuffer(); for (Place.Type type: place.getTypes()) { typelist.append(type.name()); typelist.append(", "); } text.setText("Place: " + place.getName() + "" + "\nID:" + place.getId() + "\nTypes: " + typelist.toString()); } - Run your app. Now you should see the list of types that are associated with the place you selected.
Request photo data
In this section we will update the app to request photo data and then to request and display the first photo.
- Right click res > drawable and add a new Vector Asset. Select an image placeholder such as
ic_baseline_photo_24. - Open fragment_first.xml and add an
ImageViewbelow theautocomplet_fragment. Add constraints so that thetextview_firstis below theImageView:<androidx.cardview.widget.CardView android:id="@+id/cardview" android:layout_width="match_parent" android:layout_height="wrap_content" app:layout_constraintTop_toTopOf="parent" tools:layout_editor_absoluteX="144dp"> <fragment android:id="@+id/autocomplete_fragment" android:name="com.google.android.libraries.places.widget.AutocompleteSupportFragment" android:layout_width="match_parent" android:layout_height="wrap_content" /> </androidx.cardview.widget.CardView> <ImageView android:id="@+id/imageview_first" android:layout_width="wrap_content" android:layout_height="wrap_content" android:layout_marginTop="12dp" android:src="@drawable/ic_baseline_photo_24" app:layout_constraintBottom_toTopOf="@+id/textview_first" app:layout_constraintEnd_toEndOf="parent" app:layout_constraintStart_toStartOf="parent" app:layout_constraintTop_toBottomOf="@+id/cardview" /> <TextView android:id="@+id/textview_first" android:layout_width="wrap_content" android:layout_height="wrap_content" android:text="@string/hello_first_fragment" app:layout_constraintBottom_toTopOf="@id/button_first" app:layout_constraintEnd_toEndOf="parent" app:layout_constraintStart_toStartOf="parent" app:layout_constraintTop_toBottomOf="@+id/imageview_first" /> <Button android:id="@+id/button_first" android:layout_width="wrap_content" android:layout_height="wrap_content" android:text="@string/next" app:layout_constraintBottom_toBottomOf="parent" app:layout_constraintEnd_toEndOf="parent" app:layout_constraintStart_toStartOf="parent" app:layout_constraintTop_toTopOf="@+id/cardview" /> - Open
FirstFragment.javaand edit the list of place types to be set for your AutocompleteFragment so that you includePlace.Field.PHOTO_METADATAS:// Specify the types of place data to return. autocompleteFragment.setPlaceFields(Arrays.asList(Place.Field.ID, Place.Field.NAME, Place.Field.TYPES, Place.Field.PHOTO_METADATAS)); - Update your PlaceSelectionListener to extract the photo data:
@Override public void onPlaceSelected(@NotNull Place place) { // det details of the first photo if (place.getPhotoMetadatas() != null && place.getPhotoMetadatas().size() > 0) { PhotoMetadata photo = place.getPhotoMetadatas().get(0); insertPhoto(imageView, photo); } StringBuffer typelist = new StringBuffer(); for (Place.Type type: place.getTypes()) { typelist.append(type.name()); typelist.append(", "); } text.setText("Place: " + place.getName() + "" + "\nID:" + place.getId() + "\nTypes: " + typelist.toString()); } - Implement the insertPhoto method:
private void insertPhoto(ImageView imageView, PhotoMetadata photoMetadata) { // Get the attribution text. final String attributions = photoMetadata.getAttributions(); // Create a FetchPhotoRequest. final FetchPhotoRequest photoRequest = FetchPhotoRequest.builder(photoMetadata) .setMaxWidth(500) // Optional. .setMaxHeight(300) // Optional. .build(); ((MainActivity)getActivity()).getClient().fetchPhoto(photoRequest).addOnSuccessListener((fetchPhotoResponse) -> { Bitmap bitmap = fetchPhotoResponse.getBitmap(); imageView.setImageBitmap(bitmap); }).addOnFailureListener((exception) -> { if (exception instanceof ApiException) { final ApiException apiException = (ApiException) exception; Log.e(MainActivity.TAG, "Place not found: " + exception.getMessage()); final int statusCode = apiException.getStatusCode(); // TODO: Handle error with given status code. } }); } - Run your app. You should see the photo displayed along with the text of the details of the place, including the place name, id and list of types, as shown below:
I will leave the task of improving the screen layout as an exercise.
If you run your app now and click the button that takes you to the second fragment, when you return to the first fragment, you selection of a place will have disappeared. In order for the FirstFragment to remember a place that you selected from the Place AutoComplete Widget, you need to implement a ViewModel that will keep track of the current place that has been selected. One benefit of using a ViewModel to handle your data, is that access to the ViewModel can be shared across different fragments. To illustrate that, we will now extend the app so that when you select a place from the autocomplete widget, the current place is stored in a ViewModel and then when you go to the SecondFragment, that Fragment accesses the ViewModel to display data about the currently selected place. When you return to the FirstFragment, that fragment accesses the ViewModel to restore and display its data on the currently selected place.
Create a ViewModel class to hold the selected place
Our first step in managing the data is to create a new class.
- We will create a new package called model to hold the data classes. Right click on your Java Package folder in the Android panel and select New > Package. Give your new package the name
model. - Right click on your model package folder and select New > Java Class. Give your Java class the name
CurrentPlaceViewModel. - Open CurrentPlaceViewModel.java (if it is not already open) and make the class
extendViewModel. Add implementation for this class as shown below:public class CurrentPlaceViewModel extends ViewModel { private final MutableLiveData<Place> selected = new MutableLiveData<Place>(); public void select(Place item) { selected.setValue(item); } public LiveData<Place> getSelected() { return selected; } }
This provides us with a live data Place object called selected. The Place class is imported from com.google.android.libraries.places.api.model.Place. There are only two methods. The method called select receive a Place as a parameter and assigns that value into our selected variable. We should call this function when the user selects a place from the autocomplete widget. The method called getSelected will return the currently selected place as a LiveData object. This means that fragments can observe that value and be informed when the currently selected place changes.
- Having created our
CurrentPlaceViewModel, we need to updateFirstFragmentto make use of it. Add a variable toCurrentPlaceViewModel:private CurrentPlaceViewModel model; - In your
onViewCreatedmethod, add some code to initialise yourmodelvariable:model = new ViewModelProvider(requireActivity()).get(CurrentPlaceViewModel.class); - Refactor
FirstFragmentto move all the code to display data about a place (currently that is inside youronPlaceSelectedevent handler) into a method, so you can call that method whenever you need to display the details of the current place. Here is my method:private void displayPlaceData(Place place) { if (place.getPhotoMetadatas() != null && place.getPhotoMetadatas().size() > 0) { PhotoMetadata photo = place.getPhotoMetadatas().get(0); insertPhoto(imageView, photo); } StringBuffer typelist = new StringBuffer(); for (Place.Type type: place.getTypes()) { typelist.append(type.name()); typelist.append(", "); } text.setText("Place: " + place.getName() + "" + "\nID:" + place.getId() + "\nTypes: " + typelist.toString()); } - Update your
onPlaceSelectedevent handler to call the newdisplayPlaceDatamethod and to inform theCurrentPlaceViewModelthat a new place has been selected:@Override public void onPlaceSelected(@NotNull Place place) { currentPlace = place; displayPlaceData(currentPlace); model.select(currentPlace); } - The final step in this part is to make FirstFragment override the onResume lifecycle method, so that when the fragment is resumed, it will get the current selected place from the ViewModel and update the UI accordingly:
@Override public void onResume() { super.onResume(); currentPlace = model.getSelected().getValue(); if (currentPlace != null) { displayPlaceData(currentPlace); } } - Run your app. Select a place from the autocomplete widget, then click the button to nagivate to
SecondFragmentand then navigate back toFirstFragment. You should see thatFirstFragmentnow restores the current selected place to the UI when it is resumed.
Update SecondFragment to use CurrentPlaceViewModel
Your layout for SecondFragment (in fragment_second.xml) contains a TextView that doesn't show any text
- Open SecondFragment.java and add the following code to the end of the
onViewCreatedmethod
This code gets theTextView text = view.findViewById(R.id.textview_second); CurrentPlaceViewModel model = new ViewModelProvider(requireActivity()).get(CurrentPlaceViewModel.class); model.getSelected().observe(getViewLifecycleOwner(), item -> { // Update the UI. text.setText(model.getSelected().getValue().getName()); });CurrentPlaceViewModeland sets up anobservemethod to observe theLiveData. When the observer is informed that theLiveDataobject has a new value, it will update theTextViewto display the name of the selectedPlace. - Run your app. Select a place form the autocomplete widget, then click the button to navigate to
SecondFragment. You should see that the name of the place that you selected inFirstFragmentis now displayed in the UI for SecondFragment. TheSecondFragmenthas access to the wholePlaceobject representing the current selected place and so any data from that object could be used inSecondFragment.
The related concept documentation is in 8.1: Places API.
Android developer documentation:
- Getting started with Google Places.
- Place Autocomplete
- Place data fields
- Place types
- Place photos
- ViewModel reference
- Guide to the ViewModel architecture.